Wednesday, September 17, 2014

NSI ALS Ice Bucket Challenge


NSI University Eastern Europe took place at 9-11 of September 2014 in Gdansk.
After we took that pretty photo with all distributors, educators and managers it wasn't over. I was nominated for ALS Ice Bucket Challenge three times already, last time during my visit to Poland by Anna Temchenko from Ukraine.
Grazyna Brylowska, president of NSI Eastern Europe from Poland and Denise Wright, NSI Ambassador from UK were nominated too. We decided to do it in NSI Style.
We put on our NSI rhinestone aprons and in front of all our partners let the waiters pure ice cold water on us.

This is how it looked like:
NSI ALS Ice Bucket Challenge

I thought it is too cold and painful but it wasn't!
Really refreshing!

If you liked this post, please click "Like" below or share. Thank you!

Monday, September 15, 2014

Nail Couture Yekaterinburg team won 13 trophies and 2 Grand Prizes!


Nail Couture Yekaterinburg team won 13 trophies and 2 Grand Prizes!
11-12 of September 2014 Nail Sculpting and Nail art competition took place. Yulya Khasanova was among judges of this championship.
Congratulations team Nail Couture Yekaterinburg! You did a great job and amazing art works. Keep rocking!


Saturday, September 13, 2014

NSI University Eastern Europe


I am back to this blog now. Bianca Van Eeden inspired me to continue blog in English. Most of our international friends from NSI and anybody who is interested in nail industry cannot read Russian. That’s why I decided to continue blogging. If you can read Russian this is the link to my Russian blog.
Thank you Bianca for being my motivation!

9-11 of September 2014 NSI University Eastern Europe took place in Gdansk, Poland.
Distributors from 14 countries attended this event.
During three days distributors, sales people, and educators had an opportunity to test new NSI products, learn product chemistry and take part in evaluation to get the trophies.


Special guest Fred Slack, founder of NSI Company and inventor of acrylic nails opened the University and explained the process of creating new products. Every Nail Tech could ask any questions and share their ideas with him.
Isabel Fisher, director of international sales from Philadelphia also joined this event.


Denise Wright, UK world champion was hosting the University and shared her experience and techniques in sculpting.
Grazyna Brylowska, president of NSI Eastern Europe organized this event.

I was working as Russian interpreter and hosted the third, Nail art day of NSI University. It was an honor for me to work with Denise Wright and quite a challenge to comment while I show my demo in two languages.

I like working with NSI team and like these events. It is unique opportunity to meet with your colleagues around the world and share some experience, ideas and receive a shot of motivation.
My favorite part about NSI is that while being a worldwide top nail company they can always stay foolish.

Love you all!

You can always find pictures and updates about NSI University 2014 on my Facebook page. 

If you like this post, please like it or share using links below.

Tuesday, February 25, 2014

Nail Couture team won 15 awards at Nevskie Berega championship in St. Petersburg, Russia!

Nail Couture team won 15 awards at Nevskie Berega championship in St. Petersburg, Russia!

Participants from Moscow, Yekaterinburg, Pervouralsk, Nizhnii Tagil were among Nail Couture team members.
Here are the happy faces of lucky winners and some of their art works:


Want to become part of our team?
Become successful and win national and international championships?

Sign up for competition training today at info@tristar77.ru
Or facebook: https://www.facebook.com/NailTrainingCenter

Sunday, October 27, 2013

Textured Gel Tutorial

Especially for you, gel lovers!
In the visual arts, texture is the perceived surface quality of a work of art. It is an element of two-dimensional and three-dimensional design and is distinguished by its perceived visual and physical properties. Use of texture, along with other elements of design, can convey a variety of messages and emotions.
Acrylic is really good and easy to create different kinds of 3D effects and texture. We can play with it as it polymerizes right in front of our eyes. With gel, it is not that easy as all of the process runs in the lamp and we can’t really see it or take part in it.
Still, there are some techniques that allow you to create beautiful effects with gel too!
Find out how to create textured gel in this tutorial. Just follow the steps!
Art work performed by student on 3rd day of training at “Gel advanced level 5-day class” in Nail Couture training center, Moscow, Russia.
1. Sanitize both your hands and your client’s hands. Prep the natural nail: gently push back the cuticles, shorten the free edge, and take off the surface shine with 180 grit file. Apply the base gel or any other type of thin consistency clear/pink gel and cure it in UV lamp 30 seconds. Fit the form. Sculpt a thin base layer of the free edge with a clear gel mixed with a little of blue glass paint and cure it 1 minute in UV lamp.
2. Sculpt the nail bed zone with cover gel. File the smile line with a file a little bit to make it crisper.
3. Mix two different colors using pink and blue glass paints. Add couple drops to the clear gel and mix it carefully. It is better two choose middle or thick consistency gels, like NSI Body Builder Clear or Apex Builder Clear. Sculpt the free edge with two colors of pre-mixed gels. Before curing put the plastic wrap on top of the gels and create some wrinkles using pusher, orangewood stick or any other instrument. Put it in the UV lamp and cure for 2 minutes.
4. Add some glitter effect powder on top to make accents on the top of the wrinkles. It’s better to apply them randomly, to mark the texture effect. Just use your imagination. Remove the form.
5. Cover the free edge with any clear gel, gently pinch it and cure. File and buff the nails.
6. Take off the dust and apply Glaze ‘N Go, cure it 90 second.
7. Nurture cuticle with cuticle oil.
Done!

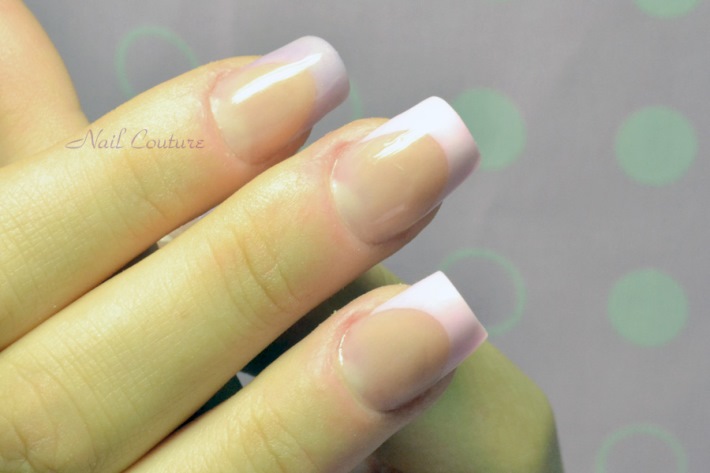
Want to create natural-looking gel nails with nice C-curves?
Learn how to pinch gel easily?
Sign up for our updates and learn more techniques at Nail Couture training center!

Wednesday, October 23, 2013

Bronze medal in St. Petersburg


Love this artwork "Pin up" by Natalya Bovykina from Ekaterinburg!
It got 3rd place on Nevskie Berega in St. Petersburg, september 2013. Congratulations!

Nail art: Natalya Bovykina
Photo: Plekhanov Anton
Style: Plekhanova Natalya
Model: Alla Knyazheva

Monday, October 21, 2013

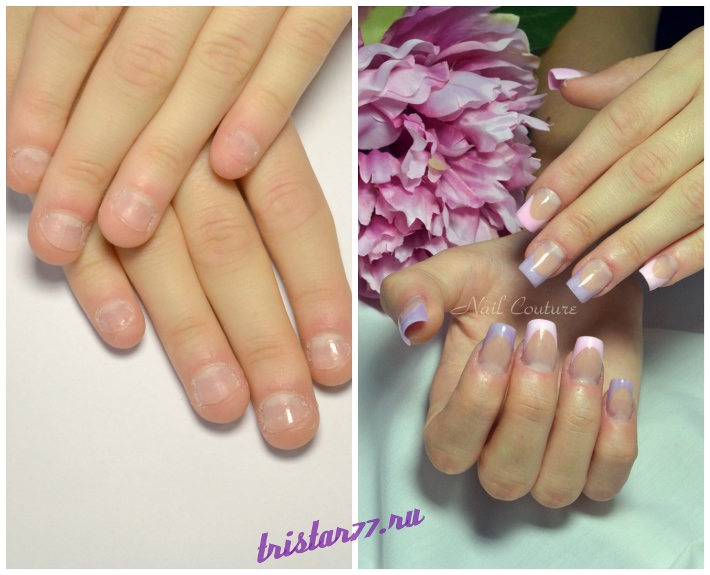
Perfect nails on nail biter's hands - 6 easy steps

Before and after


Onychophagia (also onychophagy) or nail biting, is a common oral compulsive habit (sometimes described as a parafunctional activity) in children and adults.
Biting nails can lead to broken skin on the cuticle. When cuticles are improperly removed, they are susceptible to microbial and viral infections such asparonychia
Medical literature reports cases of fingernails being severely deformed after years of nail biting.

The best way of treatment in most cases is to visit psychotherapist periodically.
However most times nail biters look for help from us, nail technicians.
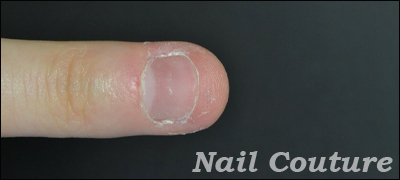
Typical nail biter’s nails are usually thin and tiny, with thick skin on lateral walls and dry cuticles. Sculpting on this kind of nails is always a challenge even for experienced nail tech.
Using tips will not help – they will peal off in less than a week and the problem will not be solved.
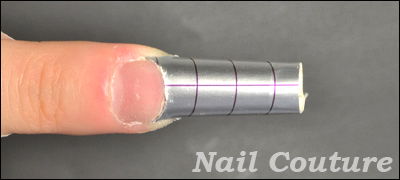
There is a solution; we can use forms and special metal sealer to sculpt perfect nails even on the smallest nail bed. Follow steps of this tutorial and find out how.

1. First prep the natural nail: gently push back the cuticle, shorten the free edge, and take off the surface shine with 180 grit file.


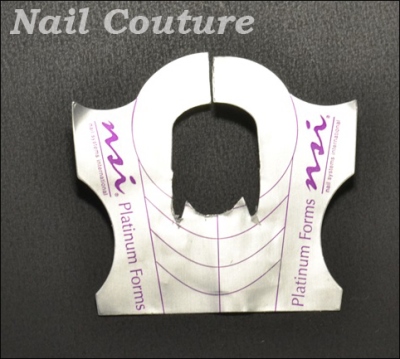
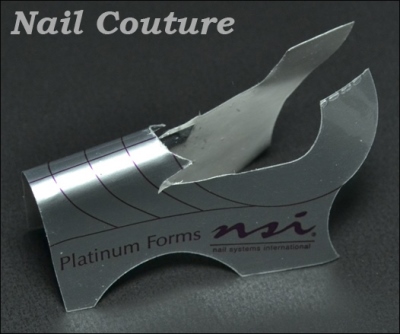
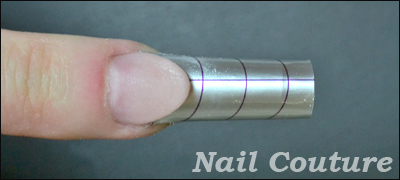
Prep the form. Stick the metal sealer from underneath the form. Cut the shape of the form according to the shape of the free edge of natural nail with sharp manicure scissors. Cut the additional space in the corners in order to fit the form easier. Choose the C-curve tool depending on the width of natural nail. Make sure it is not too wide or too narrow. Shape the surface of the form with the metal sealer underneath over the C-curve tool.


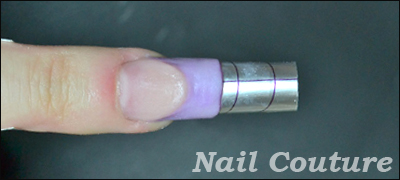
2.  Sculpt the nail bed area with camouflage acrylic powder.


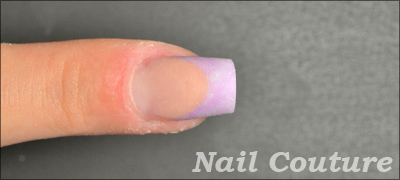
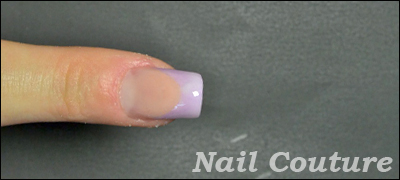
3. Sculpt the free edge with light purple color powder.


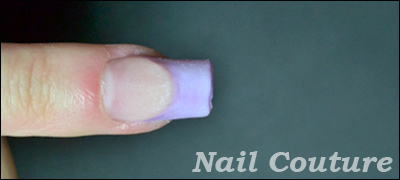
4. Take off the form and slightly pinch the nail.


5. File and buff the nail.


6. Cover the nail with Glaze ‘N Go and cure 90 seconds in UV lamp.


Final result!


Want to learn how to sculpt perfect nails?
Create amazing designs no matter how difficult are client’s natural nails?

Go for it, sign up for one of our classes today and become successful nail technician tomorrow.
For more information, contact me.