Tuesday, May 7, 2013

How to fit the form

How to fit the form


Tutorial represented by Anastasia Luksha, NSI Master Expert, Current INES judge, nail competition trainer.


1. Prep the natural nail: push back the cuticle, shorten the free edge, take the surface shine using 180 grit file. This client got pretty big lateral ridges, though it is very important to fit the form correct. On the photo you can see that the fee edge line is not even and there’s too much of excess free edge left.


2. Using 180 grit file shorten the free edge and give it the shape of the smile line. Make sure that all the corners are filed off in order to make the pinching procedure easier


3. Take the metal seal and stick it to the form. Using manicure scissors cut the form with the metal seal according to the shape of natural nail.


4. Take the C-curve tool and use it to give the form the desired shape.


5. Fit the form to the natural nail. Make sure that the center line is strictly in the center. Check the form fit from 3 views – from both sides and from the top.

Now you can go directly to applying dehydrator and nail primer and sculpt the nails!

Do you want to learn more?
Find out the secrets of form fitting for other shapes of nails – like Pipe or Stiletto?
You are welcome to our nail trainings.
For more information contact us by e-mail info@tristar77.ru or Skype #nailcouture

Friday, April 26, 2013

“Pink Gradient“ tutorial


Represented by Anastasia Luksha
NSI Master Expert, CEO of Nail Couture Studio, current judge.
Moscow, Russia

1. First sanitize your hands and your client’s hands with Sani-Pure. Prep the natural nail: gently push the cuticle, shorten the free edge, take off the shine using 180 Endurance file.


2. Apply Nail Pure Plus and Attract Primer. Fit the form. Add couple drops of Glass Paint color “Fuchsia” to the monomer.
Sculpt the natural nail edge with Peach Blush powder. Use Totally Clear powder and monomer with Glass Paint to sculpt the free edge with the shape “Pipe”. Pinch the nail and remove the form


3. File the while surface of the nails with 150 or 180 Endurance grit file. Make sure that the direction of the files goes only in the center of the nail.


4. Make sure that the sidewalls are strictly even and parallel.


5. File the free edge with the 45 angle to finish the Pipe shape. Make sure that that 45 degree angle is the same on each nail.
To create the gradient effect add one drop before sculpting next nail in order to get more intense color.


6. Cover the nail with Glaze ‘N Go and cure for 90 seconds.
The design is ready!


“Color Geometry” tutorial

Nail Art Tutorial “Color Geometry”

Represented by Anastasia Luksha
NSI Master Expert, CEO of Nail Couture Studio, current judge.
Moscow, Russia


1. First sanitize your hands and your client’s hands with Sani-Pure. Prep the natural nail: gently push the cuticle, shorten the free edge, take off the shine using 180 Endurance file.


2. Apply Nail Pure Plus and Attract Primer. Fit the form.


3. Sculpt the entire nail using “Wining White” powder to get a vibrant radiant white color. Pinch the nail and remove the form.
4. File the while surface of the nail, create the “squeareoval” shape.


5. Using purple acrylic powder create the first corner of the square working in watercolor technique.


6. Create the second square.


7. When the first layer is done, continue to add the squares of different sizes and shapes. Don’t forget to make sure that the first layer is completely cured before continuing.


8. Using dark purple paint add some strict lines on the edges of the squares.
9. Cover the nail with Glaze ‘N Go and cure for 90 seconds.


You may cover the nails with Glaze ‘N Go first and than continue working with the design. In that case, don’t use the acrylic paint as it will wash off right away.

Tuesday, December 18, 2012

NSI meeting in Kiev

The official press release from my dear friend and the President of NSI Eastern Europe, Grazyna Brylowska.


I would like to share with you the release from the NSI International Training what we conducted in Kiev, Ukraine, Nov. 23-24, 2012.
We did have wonderful time with the hosts: Igor & Galina Popadyuk – NSI Authorized Distributors for Ukraine territory.


It was a pleasure to be there, to meet NSI Educators in one place, to hear their needs, and requests. We hope to meet their all. NSI Educators did have a chance to hear all about new NSI technology from the Products Developer, and NSI Global Educator – Denise Wright. She didn’t miss a bit, and covered everything in details. These 2 days training bringing to NSI an awesome feedback. People love the new products, and know what is changed, and why they should use them. This training wasn’t just for sharing the information, and checking new products. We also evaluate educators to meet new NSI Consultants, Specialists, and Experts. I’m so proud to announce, that we have 4 new NSI Consultants, 5 NSI Specialists, and 2 Experts: Elena Radionova, Ukraine & Anastasia Luksha, Russia.. In Experts we also chose NSI Master Expert 2012. The special trophy went to Anastasia Luksha from Russia. These 2 Expert have wonderful opportunity to represent NSI in Ukraine, and around the world.
We also are very happy to announce new NSI Distributor in Slovenia. Eva Urbanija, we all wish you Good Luck!!
I would like to thank you, NSI Ukraine “International Nail Education Company” for the great time in Kiev. We have learnt a lot from you.
For those who didn’t attend please don’t be surprised to see changes in NSI products in next few months. We will have busy time, to improve products. Some of them will be discontinued, some of them will be added.
The motto of the training was: “The Best is Yet to Come…” We strongly believe, the NSI future belong to us. If you would like to see what you missed there’s the link to the video: http://youtu.be/vg4Bsfvi-TU

Thank you
Grazyna Brylowska
President for NSI Eastern Europe

Thursday, October 4, 2012

Nevskie Berega Nail championship 2012

At 28th of September till October, in Saint Petersburg, Russia, 1st International Festival of Beauty Nevskie Berega took place. International Nail championship of nail sculpting and design was held also. This time the amount of the registered participants was shaking – more than 600 entries!
Hundreds of participants showed really high level of professional skills during three days of competitions. However, Nail Couture studio students took seven awards!
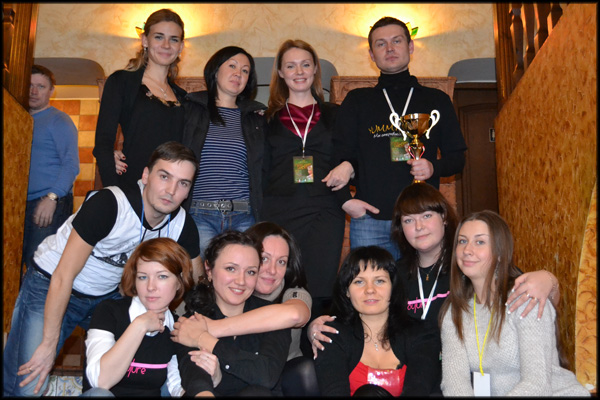
This time the Nail Couture team was not big at all – just three girls from Moscow and Ekaterinburg. They won 4 trophies and 3 medals!
Who wakes up at 5 a.m…. Get a chance to see an empty parking lot!

Being a nail model is really a tough job. Sitting for more than 4 hours without food and any chance to walk or stretch your arms… That’s why on Nevskie Berega Nail championship the models also get a medal for 1st, and and 3rd place! They deserve it!

Nail Couture team. Congratulations!


Do you want to test yourself, and do nails like a champion?
Contact us and we will show you how.


Friday, March 16, 2012

Nail art tutorial “White roses”


This tutorial is made by Yuliya Hasanova, ENTITY educator, Ekaterinburg, Russia.


  • Sanitize both your hand and your client’s hands.
 
  • Prep the natural nail as usual: push back the cuticle, take off the surface shine with the 180 grit file.
 
  • Fit the form.
 
  • Sculpt a thin layer using Lavender glitter acrylic powder. Gently pinch the nail and take off the form.
 
  • Sculpt the rose petals with the white powder.
 
  • Place the lines of acrylic expansions using Nail Fuse.
  • How to create acrylic expansions?
  • 1.      Take the form paper
  • 2.      Place an acrylic bead of white powder to the shiny side of the paper and fold it.
  • 3.      Roll it with the sculpting tool
  • 4.      Wait a little bit. Open the paper, cut the acrylic expansion in the shape of the lines.
      
  • Sculpt the leaves near the roses.
 
  • Cover the entire nail with Clear acrylic powder. Gently pinch the nail again.
  • File the nail using Shaper, Refiner. Buff the surface and shape of the nail with the Perfector buffer.
  • Cover the nail with Entity One Gel Top Coat.
  • Condition the cuticle with the Cuticle oil.

 
You can make this design exactly like it is shown in tutorial above. Or, you can also extend the natural nail bed with Nudite powders and place the design only in the free-edge area – and you’ll get a great french-style design!

On the final photo you can see the combination of different styles: it is French-style design on four nails, and a pure inlay acrylic design on the middle nail. Your clients will definitely love this soft charming design!

Good luck!
Try and create!

Monday, February 27, 2012

Our trophies from St. Petersburg!


Once again, the International Beauty Expo Nevskie Berega hosted thousands of visitors and lived up to their expectations. Beauty Expo - an event which was attended by contestants, exhibitors of professional trade shows guests and all beauty admirers. It's been five days of celebration and magic.
Our team with competitors from Moscow, St. Petersburg and Ekaterinburg took part in International Cup of Friendship on Hairdressing, make-up  and Nail-Design.
We got 9 trophies!!!