Especially for you, gel lovers!

In the visual arts, texture is the perceived surface quality of a work of art. It is an element of two-dimensional and three-dimensional design and is distinguished by its perceived visual and physical properties. Use of texture, along with other elements of design, can convey a variety of messages and emotions.
Acrylic is really good and easy to create different kinds of 3D effects and texture. We can play with it as it polymerizes right in front of our eyes. With gel, it is not that easy as all of the process runs in the lamp and we can’t really see it or take part in it.
Still, there are some techniques that allow you to create beautiful effects with gel too!
Still, there are some techniques that allow you to create beautiful effects with gel too!
Find out how to create textured gel in this tutorial. Just follow the steps!
Art work performed by student on 3rd day of training at “Gel advanced level 5-day class” in Nail Couture training center, Moscow, Russia.
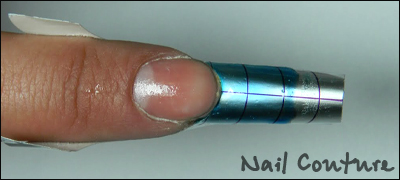
1. Sanitize both your hands and your client’s hands. Prep the natural nail: gently push back the cuticles, shorten the free edge, and take off the surface shine with 180 grit file. Apply the base gel or any other type of thin consistency clear/pink gel and cure it in UV lamp 30 seconds. Fit the form. Sculpt a thin base layer of the free edge with a clear gel mixed with a little of blue glass paint and cure it 1 minute in UV lamp.
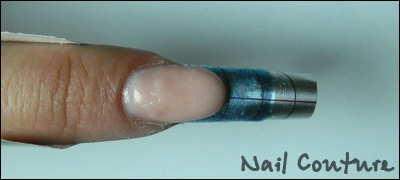
2. Sculpt the nail bed zone with cover gel. File the smile line with a file a little bit to make it crisper.
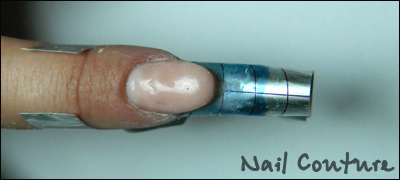
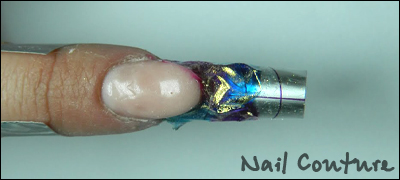
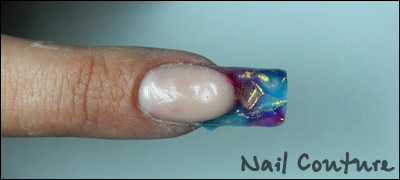
3. Mix two different colors using pink and blue glass paints. Add couple drops to the clear gel and mix it carefully. It is better two choose middle or thick consistency gels, like NSI Body Builder Clear or Apex Builder Clear. Sculpt the free edge with two colors of pre-mixed gels. Before curing put the plastic wrap on top of the gels and create some wrinkles using pusher, orangewood stick or any other instrument. Put it in the UV lamp and cure for 2 minutes.
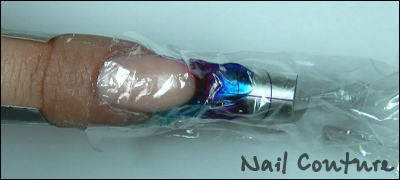
4. Add some glitter effect powder on top to make accents on the top of the wrinkles. It’s better to apply them randomly, to mark the texture effect. Just use your imagination. Remove the form.
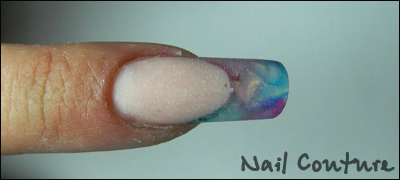
5. Cover the free edge with any clear gel, gently pinch it and cure. File and buff the nails.
6. Take off the dust and apply Glaze ‘N Go, cure it 90 second.
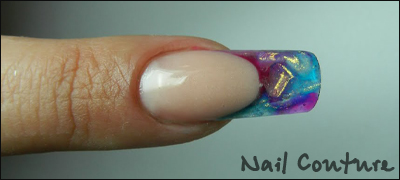
7. Nurture cuticle with cuticle oil.
Done!

Want to create natural-looking gel nails with nice C-curves?
Learn how to pinch gel easily?
Sign up for our updates and learn more techniques at Nail Couture training center!
No comments:
Post a Comment